Packet
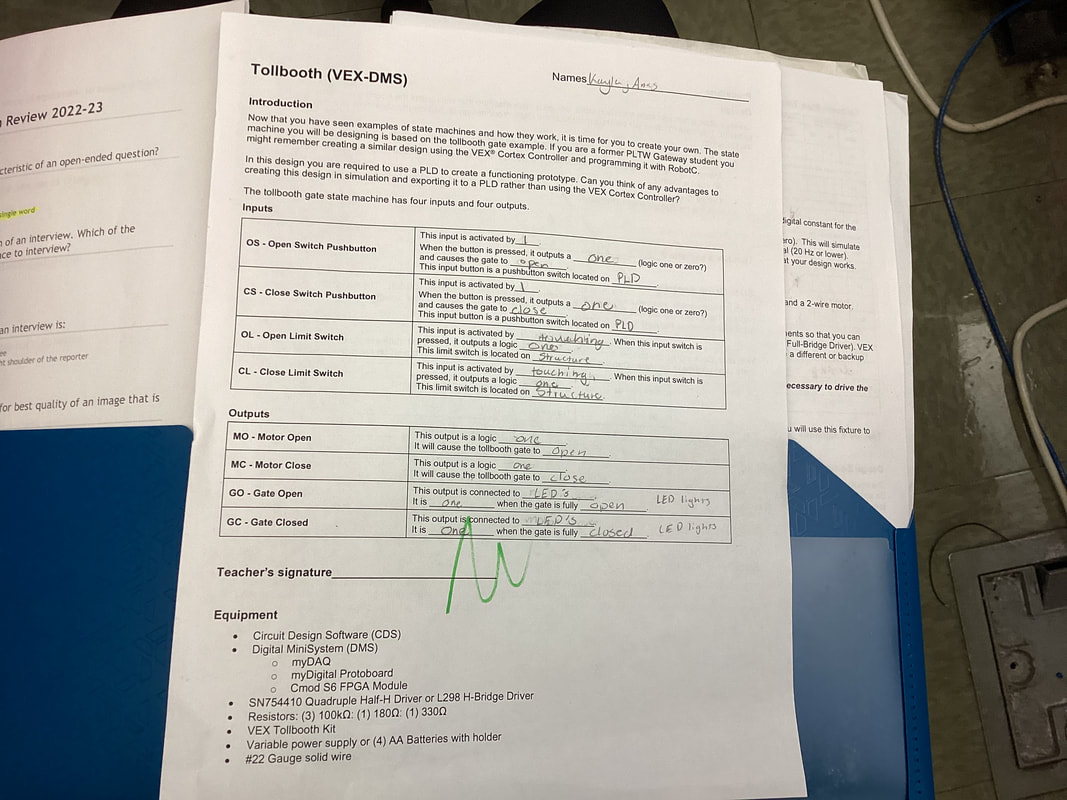
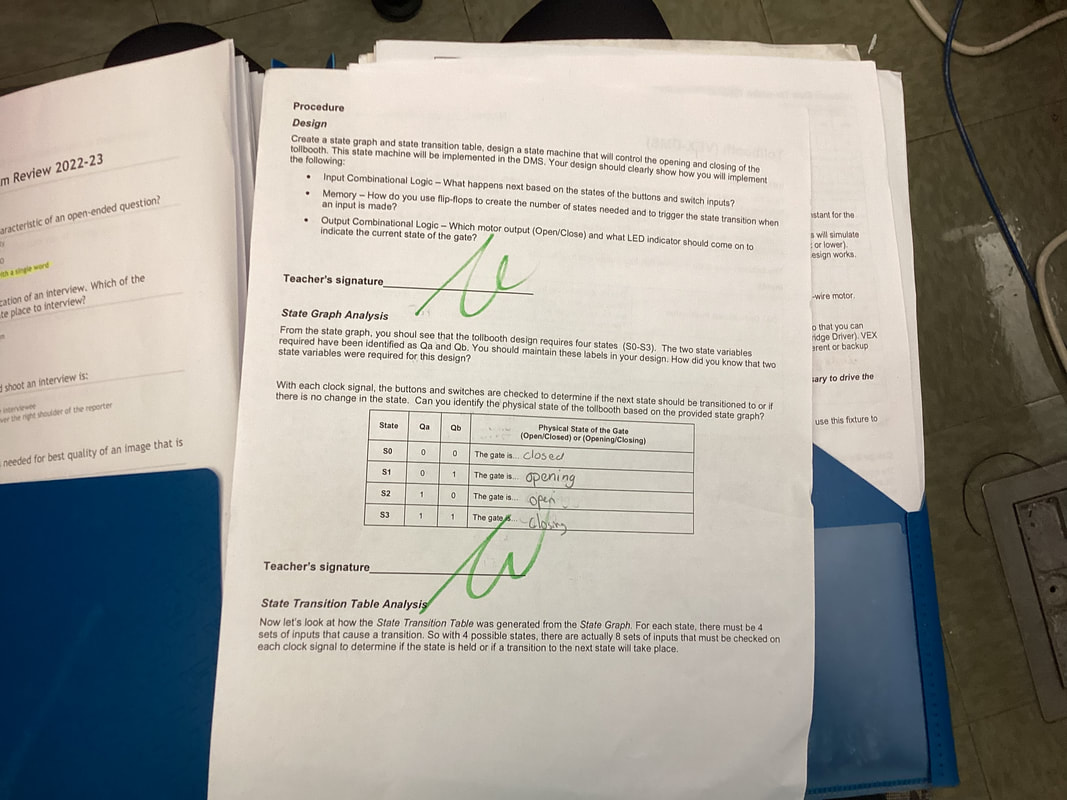
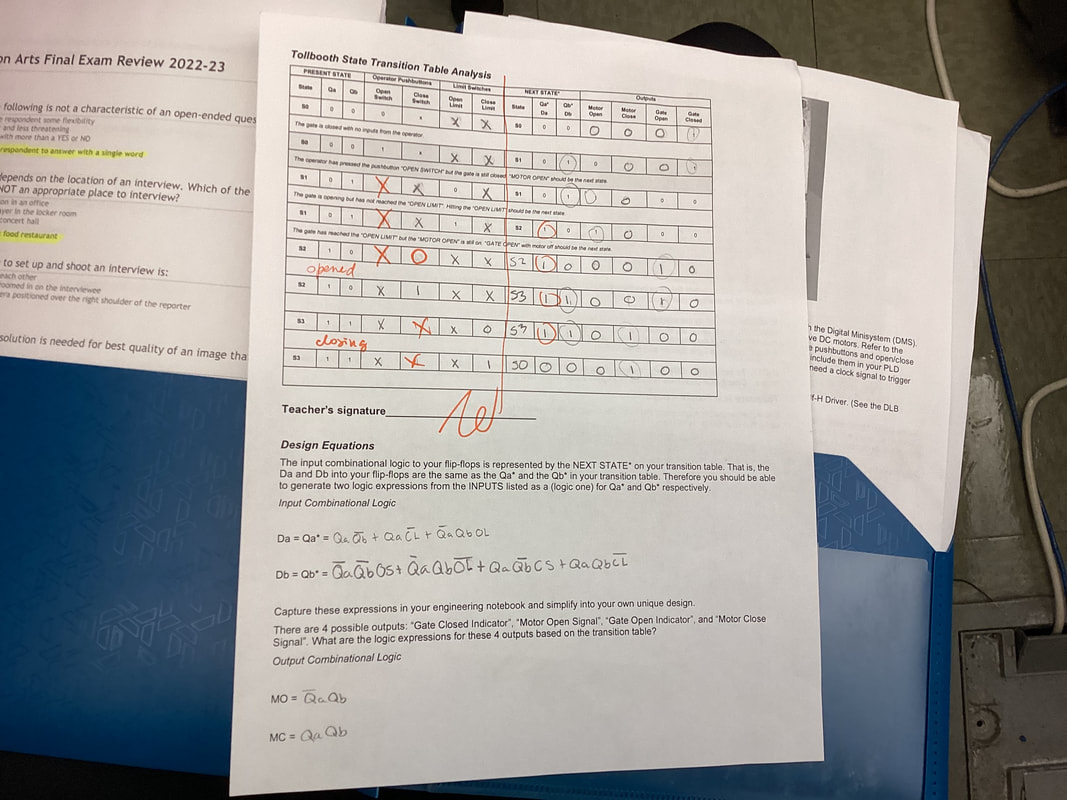
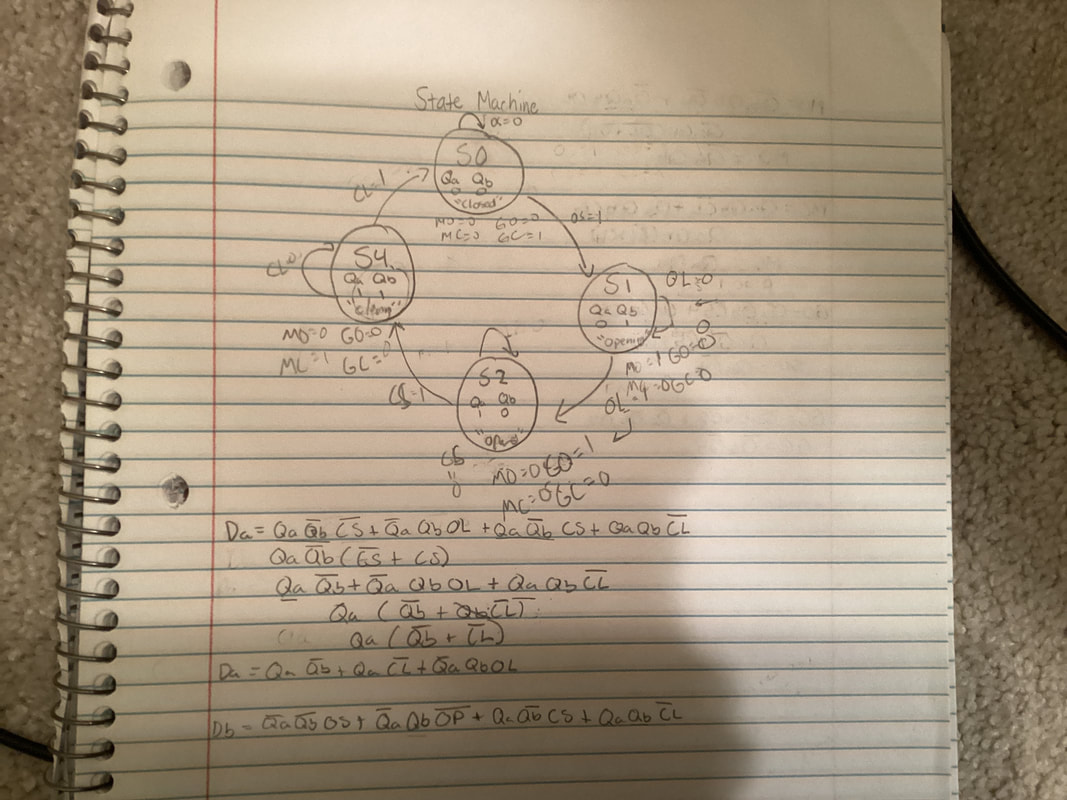
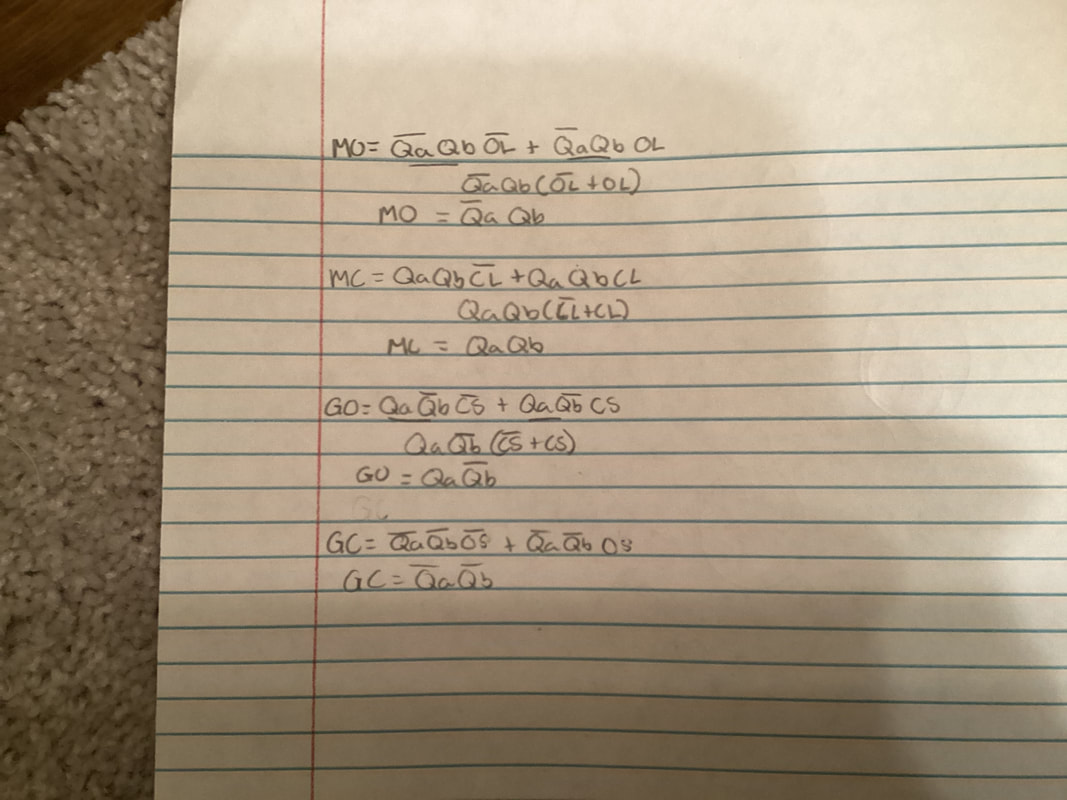
The inputs represent what it wants our outputs to do and the state (Qa, Qb). So when our input is open switch off we are in state variable S0 meanign Qa=0 and Qb=0. Our outputs from this will will be everyhting on zero except for gate closed because the gate is represented as closed and the switch has not be turned on yet, as it transitions to the next state it will have the open switch at 1 and everything will still be the same. Now it has reached state S1 meaning Qa=0 and Qb= 1. At this state the open limit will be off because it is in motion to get there, and this also puts our output on for open motor and off for everything else. As it transitions to the next state it will make the input open limit open because it is transitioning to opening the gate fully. At the next state S2 meaning Qa=1 and Qb=0. Close switch will be at zero for our input and the gate open will be on with everything else off, because it is fully open now. As it transitions to the next state the input close switch will turn on because the next state will be closing the gate. At the next state S4 meaning Qa=1 and Qb=1. Close limit will be off for the input because it is transitioning to close but has not yet. The ouputs will be Motor closing on and everyhting else off because the motor is closing. As it turns back to state S0 the close limit will turn on for the input because it is becoming closed at this part.
MultiSim
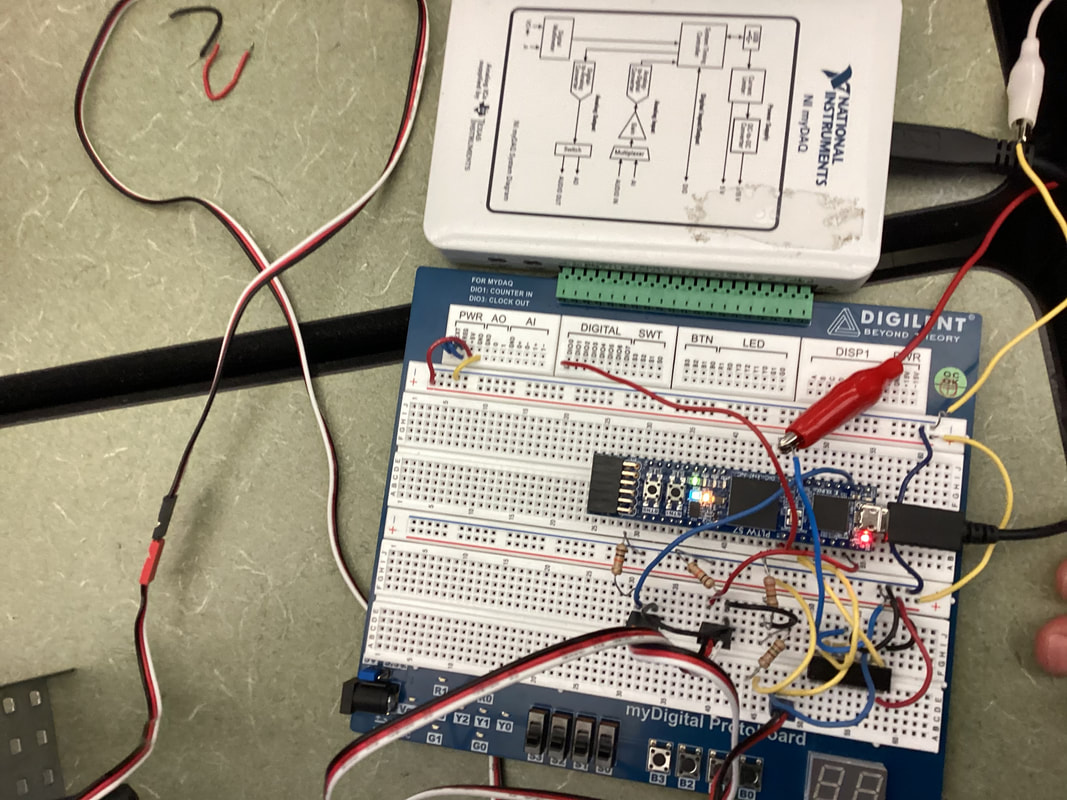
VEX
Conclusion
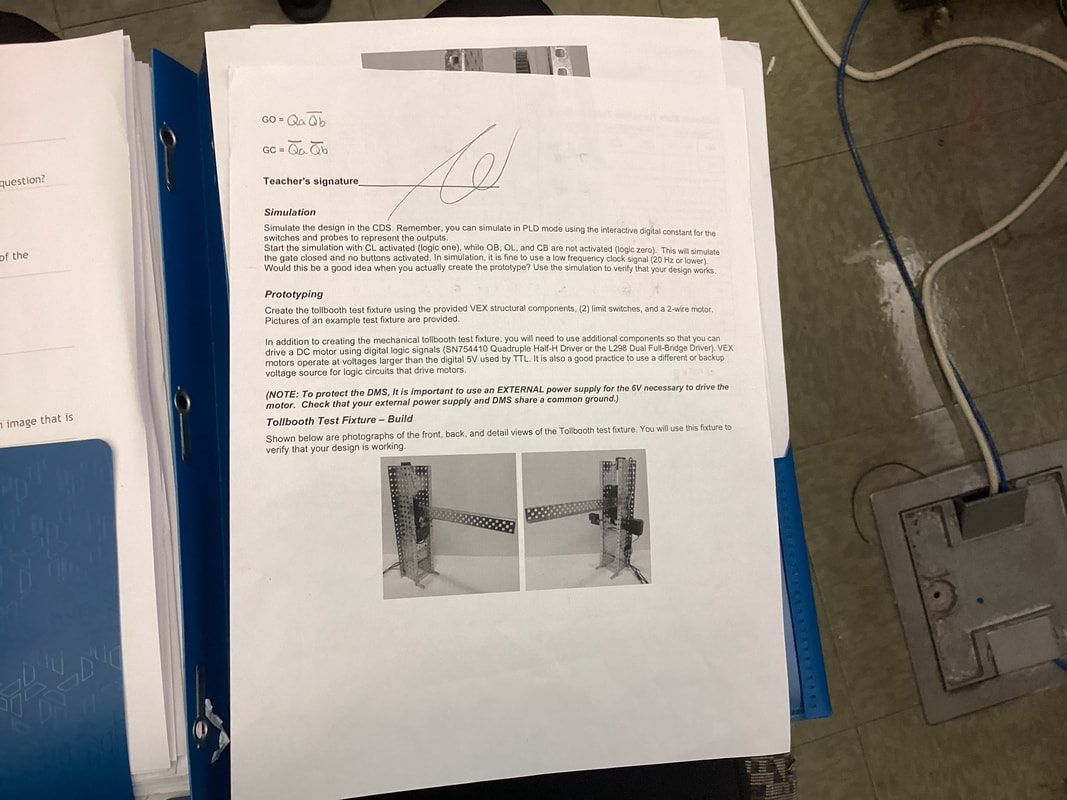
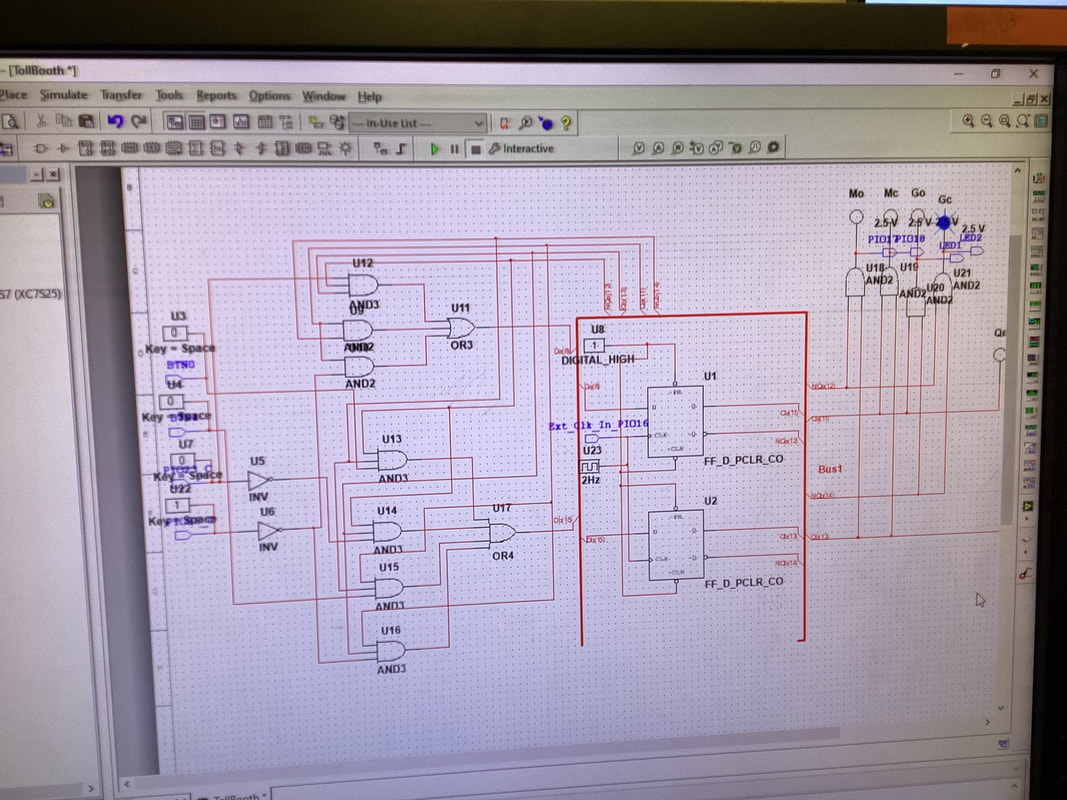
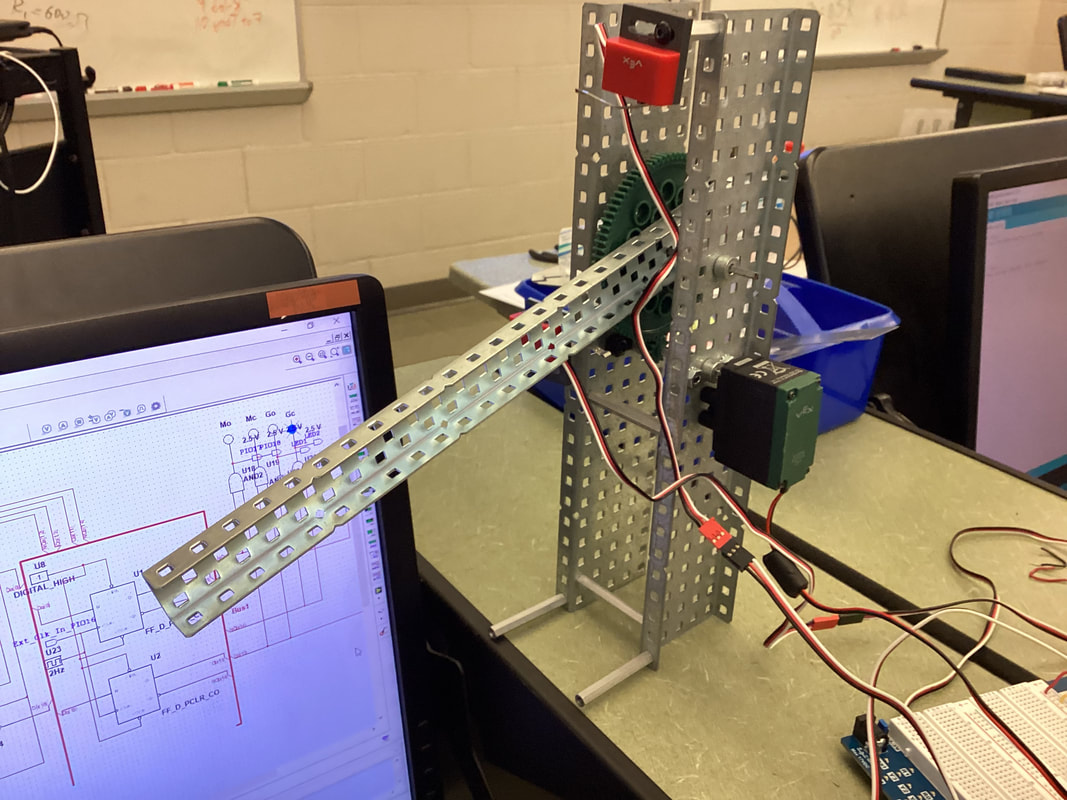
This project was a long one, but with endurance keeping track, we were able to accomplish it. We first had to make sure we understood the inputs and outputs, and this included making sure we knew what they did to make it work. We had some setbacks along the way the state transition went and how the state table was set up. We had a little problem with our mutism with one of the wires being connected wrong, and additionally the VEX itself was wired incorrectly with the pin being turned around. We had others help us so that we could get a fresh pair of eyes to see what we weren't seeing. This helped us see different ways to make a schematic and then was additionally helpful in strengthing our reading of schematics. It developed over our course in DE, and helped us with this final project. I would understand the whole project before just jumping in to get it done, because of the time crunch.
