Explaining Process:
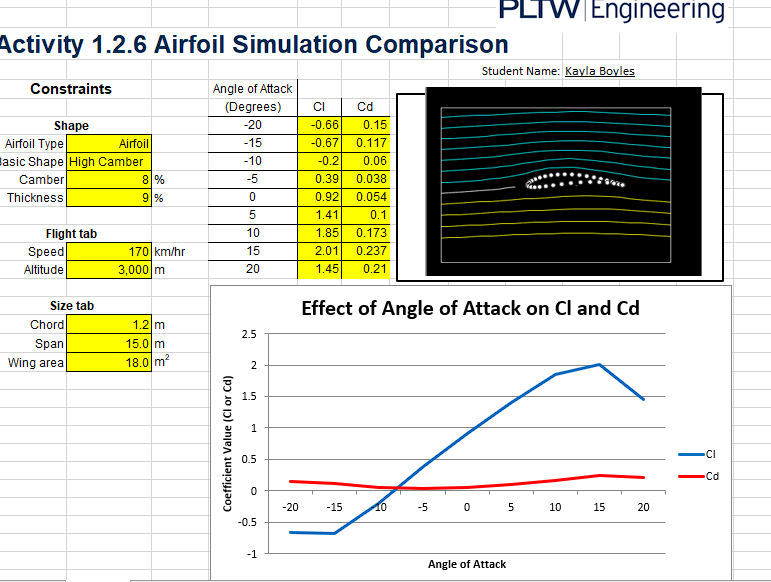
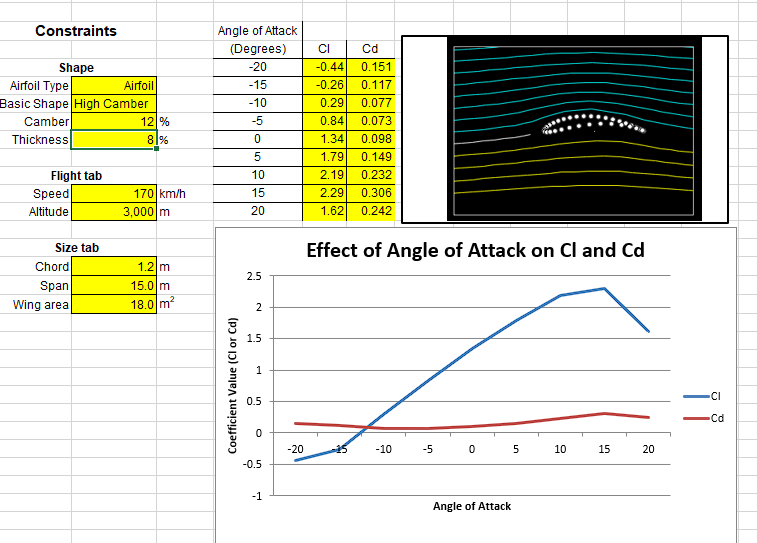
We used an airfoil simulator to design our airfoils for the basis to not build from scratch. It was giving us different camber shapes to go off of and we were able to test how we wanted it to look based off how much lift we got. The more lift we got the better, this helped because the simulator spit out the lift and drag. We were able to test with different angle of attacks also, which showed us the data for our airfoil, to see if the airfoil is efficient. We wanted to be able to hold up the higher amount of lift within the range of angle attack.
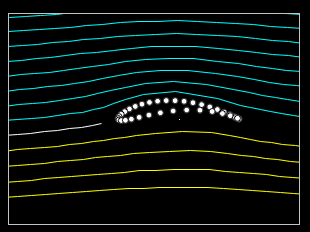
We then used the simulator to be able to test the angle of attacks. When we were given the data we put it in our excel document. Then when we had all of our data we were able to see in the plot of the points. This was able to show us the efficiency of the airfoil. By looking at the data we can see how long the lift holds out between the angle of attacks. The longer the lift is over the drag over the angle of attacks, the better airfoil.
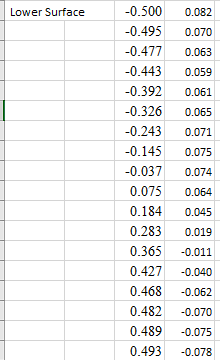
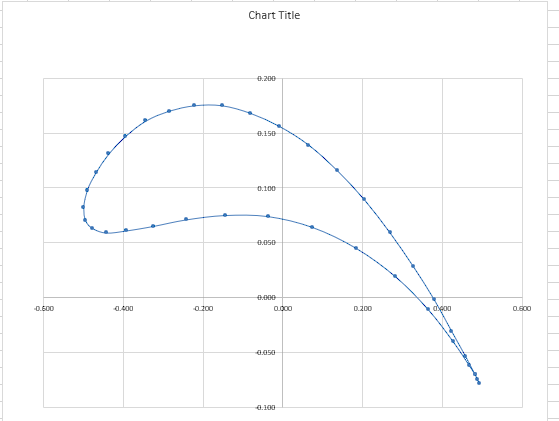
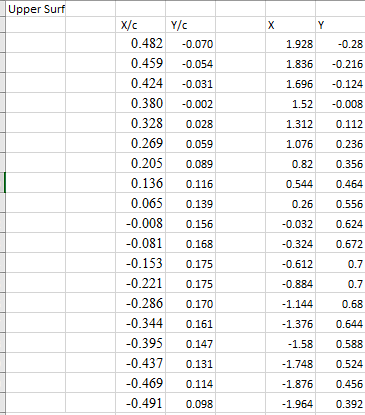
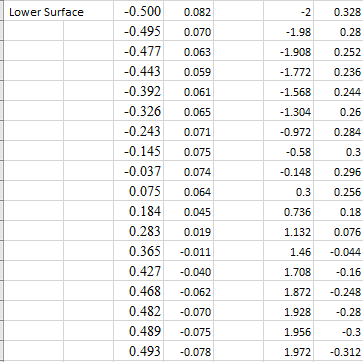
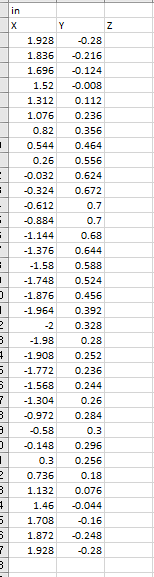
We started with getting the geometry from the simulator and pasting that into our excel document. From there we put the data in the right order so we can get a data plot of our airfoil. Once we had the plot of the data we should be able to see the outline of a airfoil if not we had to go back and see what we did wrong. My numbers overlapped and that cause me to go back and fix the double numbers.
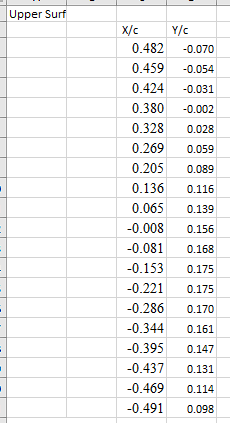
We then changed the data so that it will go into inventor. To make it likeable in inventor we times our x and y's by 4.
We then create a new excel worksheet and add all of our points we are using so that inventor can read our points without any interference. We then prepare the document by putting our units in which is inches and then we create three columns. These columns will hold x, y and z planes. We will only use columns x and y for the reason we are making a 2-D sketch. From her we submit our points into inventor.
From here open inventor and start a part. In the part we create a 2-D sketch on the X and Y plane. then from there we insert our points from the excel document. As we do this we will create a sketch from our document. We check to make sure it looks how we want it to and no overlays or gaps in the airfoil. As we are okay with the sketch we can then extrude it.
We extrude it to 3 inches. after extruding we create another sketch on the face of the 3-d object. On the sketch we enter text of our name and then hit finish sketch. Then we emboss the name into the 3-D object so that it is etched into our object. Then we are done with the building process.
We extrude it to 3 inches. after extruding we create another sketch on the face of the 3-d object. On the sketch we enter text of our name and then hit finish sketch. Then we emboss the name into the 3-D object so that it is etched into our object. Then we are done with the building process.
The method I used to build my airfoil was patience and listening. As Mrs. Gallo Pointed out I was very focused doing this project and this helped me effectively accomplish my project. I had little trouble shooting for this reason and I thought it was a smart method. Using this effective method I was able to finish this project in little time.
I think using this method to test a small version of a airfoil in a wind tunnel is helpful method by being able to see the efficiency of the airfoil. By this method we can troubleshoot and see where we went wrong without wasting materials in building the full scale aircraft.
I honestly loved how my project came out, something i would have done differently is experiment more with different airfoil types.
